# Table Data Extraction
Adjust **the table data extraction** to your needs by editing already existing data points or creating new ones.
{% hint style="info" %}
Alphamoon enables you to extract **complete tables** (information about the columns, data types, relationships between columns, and actual information stored in the table) from **Invoices**.
{% endhint %}
### Start with the Configuration
First, select one of your supervised processes from your Dashboard. Once you are in the **Queue** view, click the [Configuration](https://alphamoon.gitbook.io/documentation/platform-walkthrough/configuration) button.
Configuration button
From the navigation on the left side of the page, select the [**Data points definition**](https://alphamoon.gitbook.io/documentation/user-guide-how-tos/data-points-definition) tab.
Data points definition
{% hint style="info" %}
**Note:**
When you create a custom process, you will be redirected to [**Data points definition**](https://alphamoon.gitbook.io/documentation/user-guide-how-tos/data-points-definition) automatically.
{% endhint %}
{% hint style="warning" %}
**Changes to Settings**\
Bear in mind that changes to the settings will only apply to files sent from the moment these changes are made.
{% endhint %}
### Default fields
For the **Invoices**, we have already set the default table data points:
* Items table
* Tax table
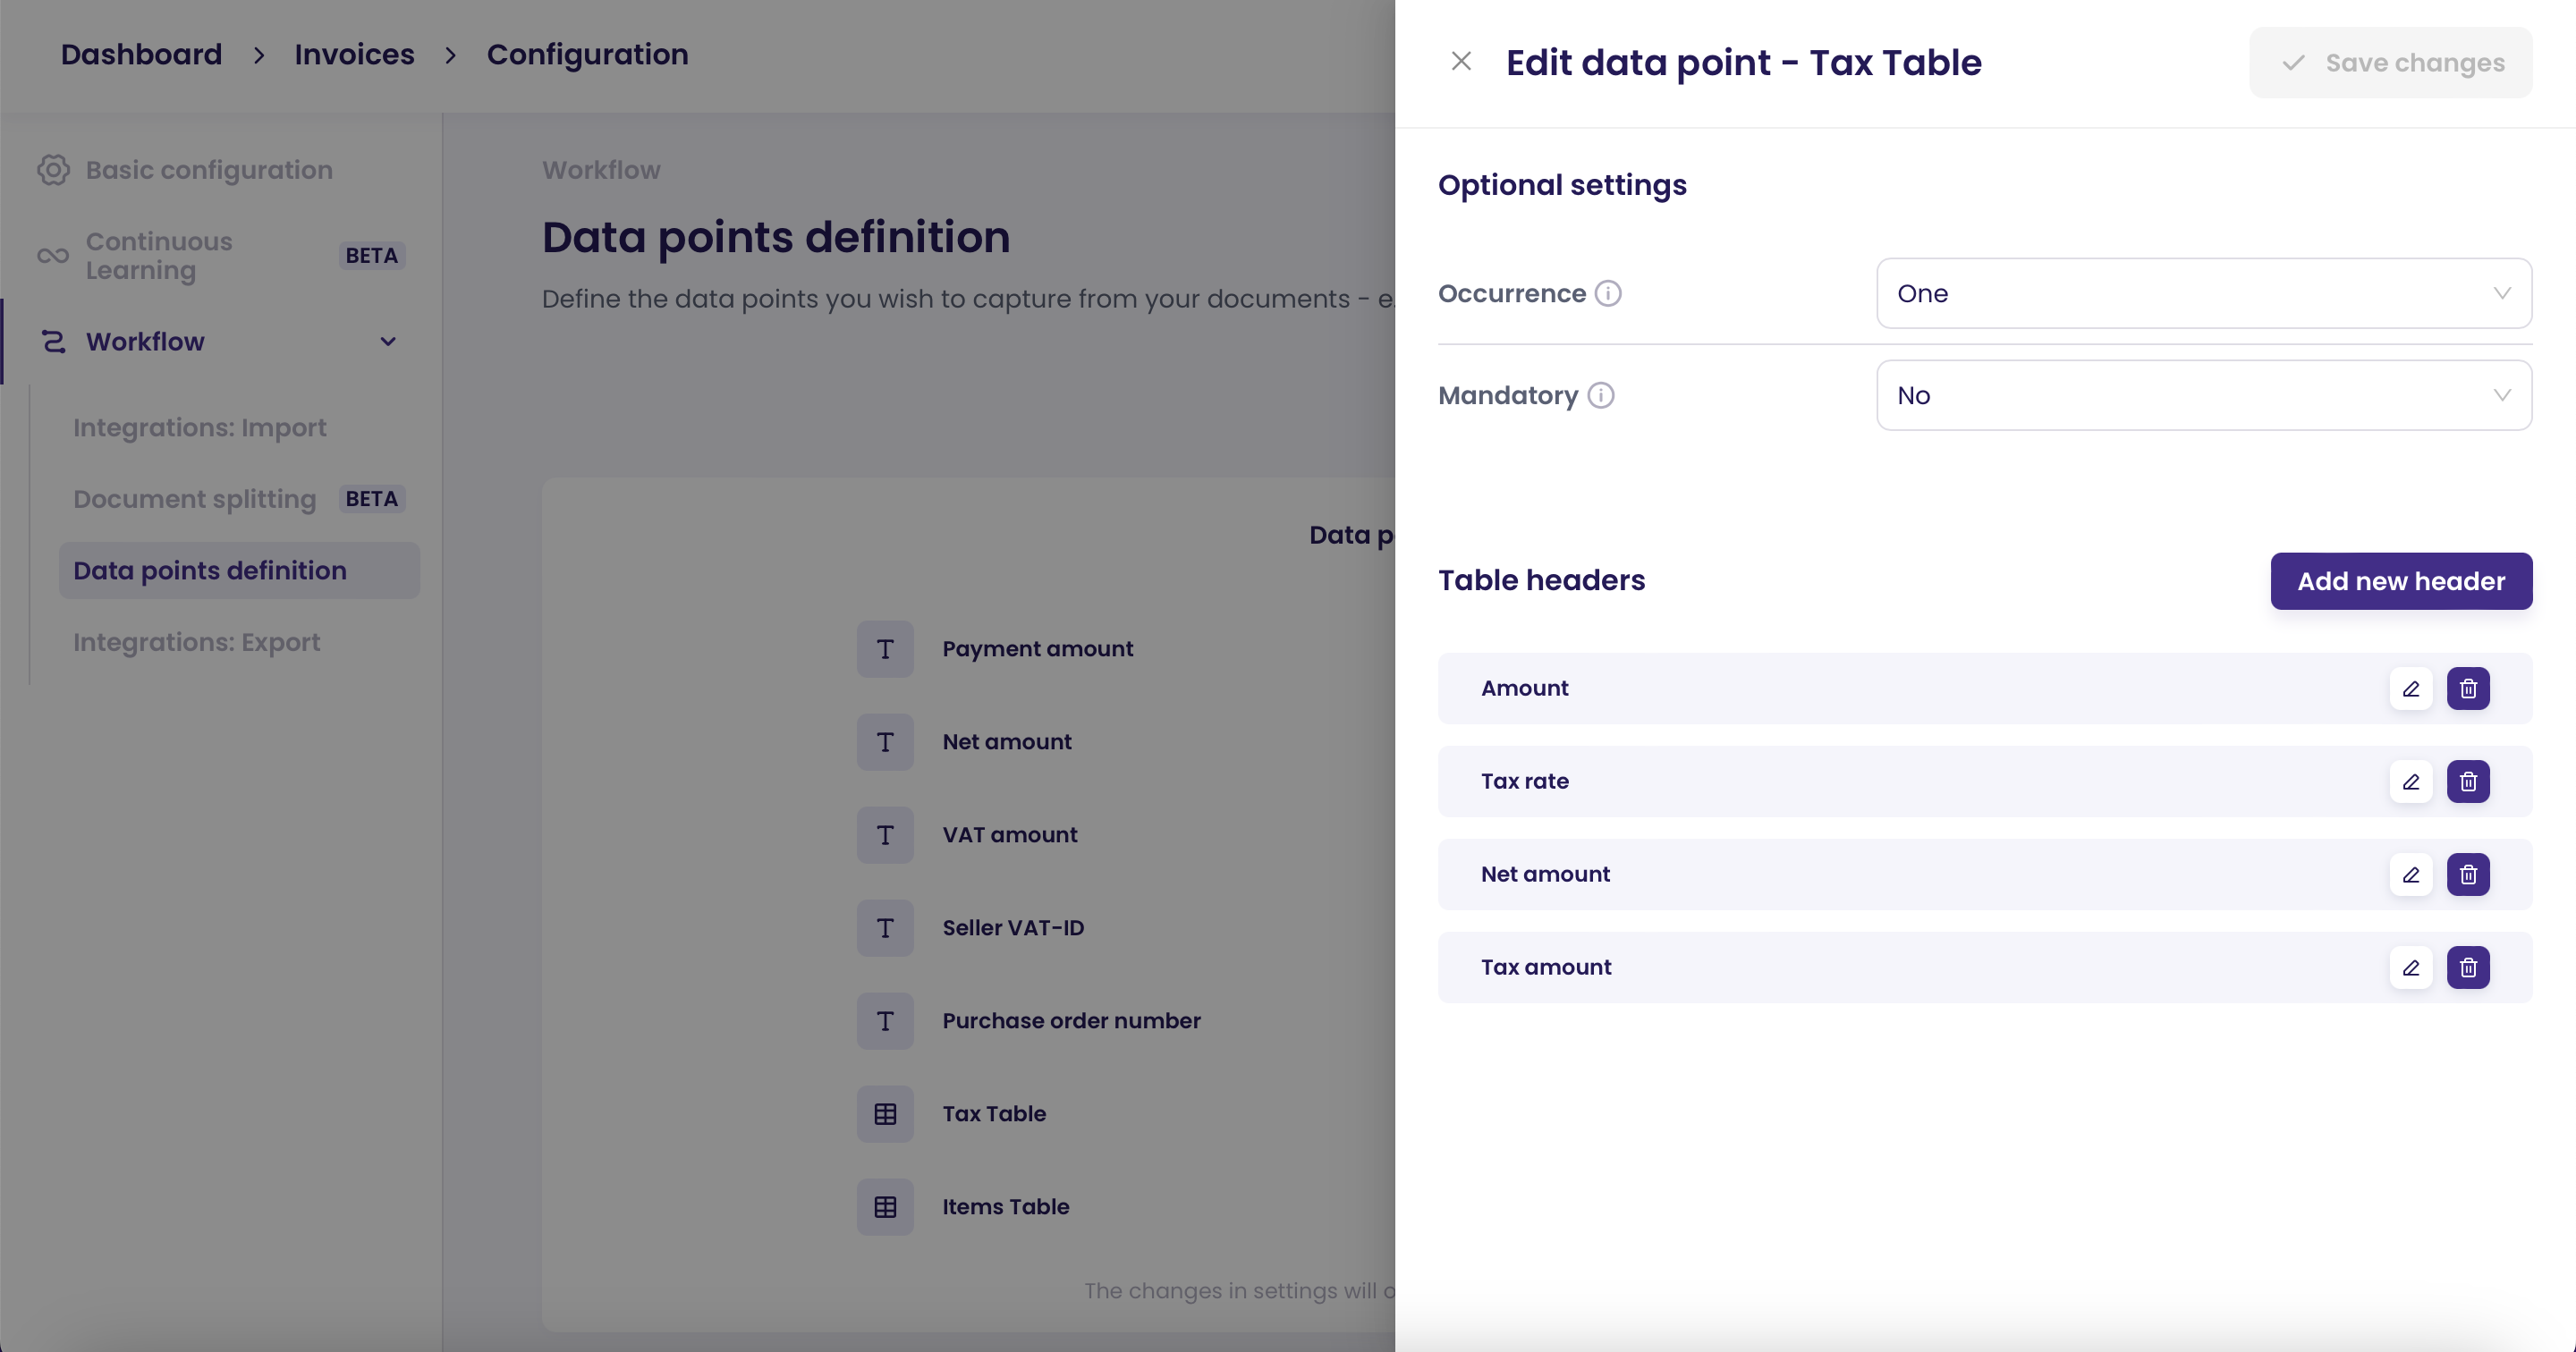
You can edit these fields - simply click the **pencil** **icon** to open the right-hand editing panel:
In the editing panel, you can:
* Set the **Occurrence**\
If the table field is unique for your document, select 'One'. If it appears more than once (e.g. you want to capture 'Date' and there are several dates within the document), go with the 'Many'.
* Choose whether this field is **mandatory** or not\
Select ‘No’ if capturing your new field is not necessary for every document to have an Accepted status. Go with ‘Yes’ in case you wish to see the Needs review status every time your field won't be captured from your documents automatically.
* Add, edit, or delete table headers.
Once you make your changes - save them by clicking the **Save changes** button on top of the panel.
### Add custom table data point
You also add your custom table data point. To do that, click the **+Add new data point** button:
Select that you want to create the **Custom** data point. Next, in the Type of data section select **Table**.
Now, name your new table data point. We will use this label to automatically pull the described table data from your files.
Next up, go through the **optional settings** if needed.
#### Add table headers
Start adding your custom table headers by clicking the **Add new header button**. The following view will appear:
* Type in the header name
* Decide whether you want data to be captured automatically
* Set the occurrence (described above)
* Choose whether your new table header is mandatory (described above)
Then hit the **Add** button - your new header will appear on the table headers list. You can edit or delete it any time you want.
Once you finish adding table headers, click the **Create new field** button on top of the panel.
### Supervision
#### Extraction list
Once you enter the Supervision, your Item table or Tax table fields should be displayed in the **extraction list** on the right section of the page. From this level, you can either: edit the field by changing its label, copy its value, or delete it.
#### Document viewer
Document viewer may also come in handy at this point.
First, you can[ open and edit the extracted table](https://alphamoon.gitbook.io/documentation/user-guide-how-tos/supervision/how-to-open-edit-or-remove-the-extracted-table) just by clicking on it.
Secondly, if one of the tables was not extracted at all, from the Document viewer level you can create a new field by selecting the table area and clicking on the **+** icon. It will open the following window:
Create new field
\
In the **Type** section select **Table**. Then, choose one of the **labels**, and click the **Create** button. Your table should now be a part of the **extraction list**.
{% hint style="info" %}
**Note:**
Want to learn more about tables? Check out our [table mask](https://alphamoon.gitbook.io/documentation/user-guide-how-tos/supervision/how-to-open-and-edit-a-table-mask) and [extracted table](https://alphamoon.gitbook.io/documentation/user-guide-how-tos/supervision/how-to-open-edit-or-remove-the-extracted-table) guides.
{% endhint %}
#### See next: